
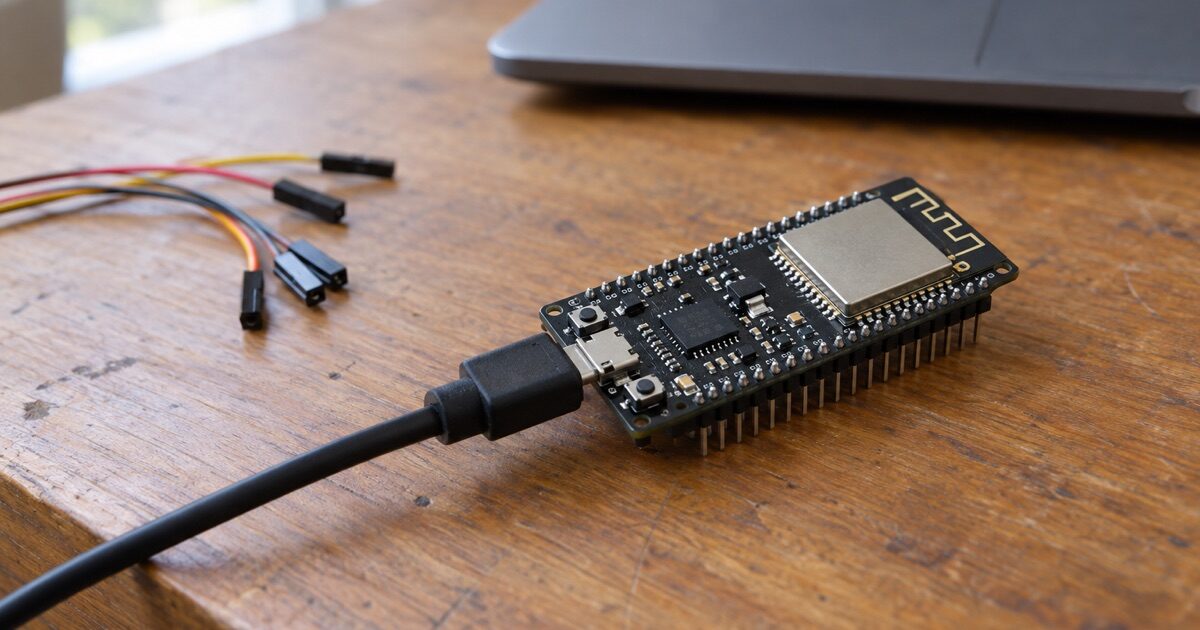

From the community
A user asked whether Thinger.io works with ESP-IDF. It does.
In Thinger.io we do our best to listen to what our community needs. So when a user asked whether Thinger.io could be integrated with the ESP-IDF framework, we jumped at the opportunity to try it out and provide a viable solution for anyone who wants to dive into Espressif's low-level development framework, or who already has a project running on ESP-IDF and wants to give it a cloud infrastructure.
For an easy integration of the most common consumer microcontrollers, years back we developed the Thinger.io Arduino Library, which connects boards to the platform with the most used framework at the time. With time and innovation come new opportunities, and this is one of them.
This post explains how to use the ESP-IDF framework to connect an ESP32 to Thinger.io with that same Arduino Library, alongside the arduino-esp32 core built as a component of the ESP-IDF project. Every command and listing below is the one we ran.

The integration takes six steps, each with its own section below:
Install ESP-IDF
Build and flash the hello_world example
Add Arduino as an ESP-IDF component
Add the Thinger.io library as a component
components/ and open menuconfig. Write the main file
setup() and loop() or ESP-IDF's app_main(); both listings are below. Build, flash and check the console
The setup of this post
- Host
- Linux
- ESP-IDF
- v4.4.5
- Arduino core
- arduino-esp32 as an ESP-IDF component
- Client library
- thinger-io/Arduino-Library
- Board
- ESP32
- Serial port
- /dev/ttyACM0
At the time of writing, the latest ESP-IDF version compatible with the Arduino core for ESP32 was v4.4.
Step 1
Install ESP-IDF
The first step is to have the ESP-IDF framework installed in your environment. There is no better way to do this than following Espressif's official documentation. Just note that this post uses a Linux environment and ESP-IDF version 4.4.5: at the time of writing, the latest ESP-IDF version compatible with the Arduino core for ESP32 was v4.4.
Step 2
Build and flash the example project
With ESP-IDF installed, now what? Start with the first steps of the installation guide: copy an example project, build it and flash it into the microcontroller to verify that everything works.
The first steps on ESP-IDF of the installation guide copy the hello_world example and build, flash and monitor it in one command; PORT is the serial port of your board.
cd ~/esp
cp -r $IDF_PATH/examples/get-started/hello_world .
cd hello_world
idf.py -p PORT flash monitor
To exit the monitor press Ctrl + ]. More keyboard shortcuts in the IDF monitor guide.
Once verified, add Arduino as an ESP-IDF component by following, again, its official documentation. It is important to understand the basics of the build system of an ESP-IDF project and to picture its file and directory structure: the next step adds a second component the same way.
Step 3
Add the Thinger.io library as a component
This step is very similar to adding the arduino-esp32 core as a component of the ESP-IDF project: clone the library into components/ and open the project configuration.
cd ~/esp/hello_world/components
git clone https://github.com/thinger-io/Arduino-Library.git thinger
cd ..
idf.py menuconfig
At this point there are two things to take into consideration. The first is to know which structure you will use for the main file, and to configure the project accordingly: Arduino's setup() and loop() or ESP-IDF's app_main(). This is a matter of personal preference, and the next section gives the example code for both. The difference is where the code runs:
Arduino setup() and loop()
- The code in
setup()andloop()runs in CPU 1, in an additional task on FreeRTOS - With a stack size of 8192 bytes
- The main file looks like an Arduino sketch
Option 1 in the arduino-esp32 docs
ESP-IDF app_main()
- Uses CPU 0 for this task
- Lets you launch additional tasks: more control of the execution flow
- Single execution flow, so
setup()andloop()are not available
Option 2 in the arduino-esp32 docs
Step 4
The main file of the project
Now that everything is installed and configured, the last steps of the integration: a main.cpp and the CMakeLists.txt that registers it.
Create a new main.cpp file under ~/esp/hello_world/main/ and change the CMakeLists.txt of main to use this file:
idf_component_register(SRCS "main.cpp"
                    INCLUDE_DIRS "")
Depending on the structure you chose for the main file, here is the same example in both alternatives. In both, the device exposes one resource, in_out, that takes two values and returns their sum and their product, so the connection can be exercised from the console.
Using Arduino setup() and loop()
With this option the main file looks very similar to an Arduino sketch:
//file: main.cpp

// Uncomment when one needs to troubleshoot authentication and Wi-Fi connectivity issues
//#define THINGER_SERIAL_DEBUG

// Uncomment to point to your private Thinger.io instance
//#define THINGER_SERVER "<subdomain>.aws.thinger.io"

#include "Arduino.h"

#include "ThingerESP32.h"

#define USERNAME "your_user_name"
#define DEVICE_ID "your_device_id"
#define DEVICE_CREDENTIAL "your_device_credential"

#define SSID "your_wifi_ssid"
#define SSID_PASSWORD "your_wifi_ssid_password"

ThingerESP32 thing(USERNAME, DEVICE_ID, DEVICE_CREDENTIAL);

void setup(){

  Serial.begin(115200);

  thing.add_wifi(SSID, SSID_PASSWORD);

  thing["in_out"] = [](pson& in, pson& out){
    out["sum"] = (long)in["value1"] + (long)in["value2"];
    out["mult"] = (long)in["value1"] * (long)in["value2"];
  };

  while(!Serial){
    ; // wait for serial port to connect
  }

}

void loop(){

    thing.handle();

}
Runs in CPU 1, in a FreeRTOS task with an 8192-byte stack
As mentioned above, this executes in an additional task in CPU 1, leveraging FreeRTOS.
Using ESP-IDF app_main()
In this case the flow is a single execution, so the setup() and loop() functions are not available: the Arduino-like setup runs once at the top of app_main(), and the loop is a while(true) that calls thing.handle(). This approach needs one additional configuration.
//file: main.c or main.cpp

// Uncomment when one needs to troubleshoot authentication and Wi-Fi connectivity issues
//#define THINGER_SERIAL_DEBUG

// Uncomment to point to your private Thinger.io instance
//#define THINGER_SERVER "<subdomain>.aws.thinger.io"

#include "Arduino.h"

#include "ThingerESP32.h"

#define USERNAME "your_user_name"
#define DEVICE_ID "your_device_id"
#define DEVICE_CREDENTIAL "your_device_credential"

#define SSID "your_wifi_ssid"
#define SSID_PASSWORD "your_wifi_ssid_password"

ThingerESP32 thing(USERNAME, DEVICE_ID, DEVICE_CREDENTIAL);

extern "C" void app_main()
{
  initArduino();

  // Arduino-like setup()
  Serial.begin(115200);

  thing.add_wifi(SSID, SSID_PASSWORD);

  thing["in_out"] = [](pson& in, pson& out){
    out["sum"] = (long)in["value1"] + (long)in["value2"];
    out["mult"] = (long)in["value1"] * (long)in["value2"];
  };

  while(!Serial){
    ; // wait for serial port to connect
  }

  // Arduino-like loop()
  while(true) {

    thing.handle();

  }

  // WARNING: if program reaches end of function app_main() the MCU will restart.
}
Runs in CPU 0; needs CONFIG_ESP_MAIN_TASK_STACK_SIZE = 8192
Step 5
Build, flash and watch the device come online
Regardless of the approach you used, build and flash the software into the ESP32.
cd ~/esp/hello_world
idf.py build
idf.py -p /dev/ttyACM0 flash monitor
The monitor shows the boot log and the connection to the platform
In the console you should see that the microcontroller is connected to the Thinger.io platform and that its resources can be executed.

esp32-idf device in the console: online, with the bytes exchanged, its IP address and the live transmission chart.
Conclusion
Almost any Arduino library, with full control of the microcontroller
By using the Espressif Arduino core as a component of ESP-IDF, almost any Arduino library can be integrated, among them the Thinger.io library, while keeping full control and low-level programming of Espressif's microcontrollers.
This project could go even further by mimicking what Espressif defines as the main entry point in the Arduino approach (a simpler but older version in arduino-esp32 1.0.6, the most recent in 2.0.13), and integrating your own needs alongside the connection to Thinger.io.
If you have any questions, or would like to comment further on this integration, join us at the community forum.
Connect your ESP32 to Thinger.io
Arduino, Linux, ESP-IDF and Zephyr clients, open source on GitHub, speaking the same protocol to the platform. Pick the one that matches your build.